Operating the shopbot
To be updated
Checklist: turning on and zeroing the machine
1 make sure there is no object obstructing moving parts on the machine. observe that the work surface is clean and ready to accept a new work piece.

2 make sure the emergency stop buttons isn´t depressed.
3 turn the big red switch on the controll cabinet to the ON position.


4 press the blue button on the controll pendant. this will reset the drivers for the shopbot.

5 Now, turn on the computer, and, open shopbots controllprogram. The screen should now look like this:

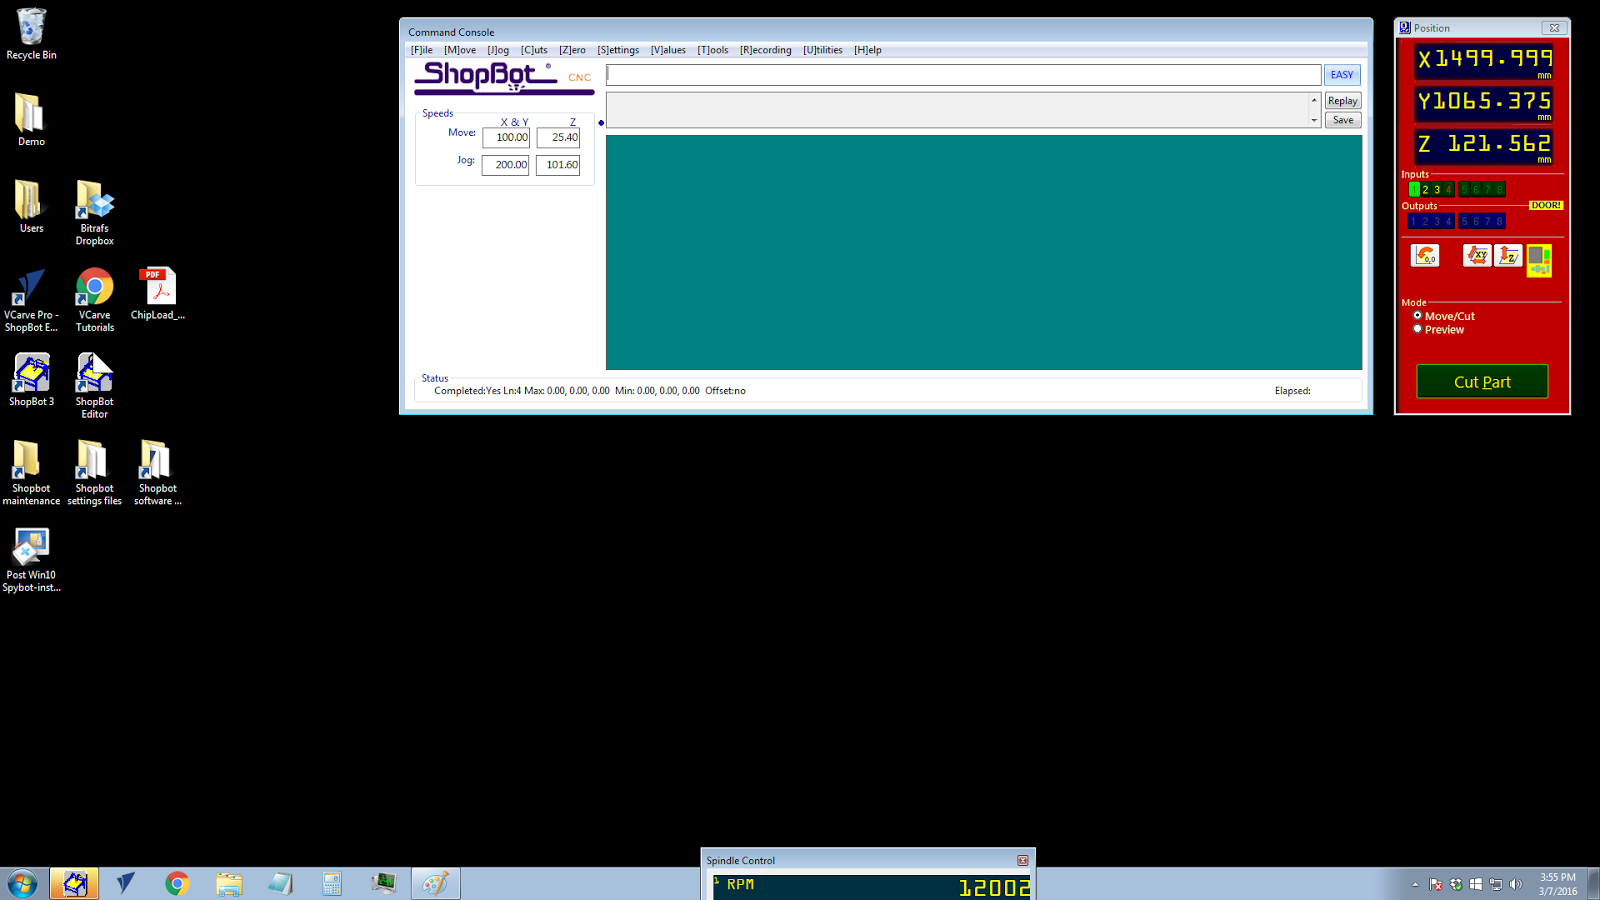
6 It is necesary to zero the machine before use. pressing the XY zero button will start the zeroing procedure. The machine will then move to the maximum reach in each direction.
7 In the controll software, go to cuts -> spindle warmup routine (shortcut for this is C5)
Start the spindle with the green button, and run the program. This will slowly increase the spindle speed to the maximum, heating the spindle´s bearings. This is important to keep the bearings last.

Once the routine is completed, the shopbot is ready to use.
Manual movement of the machine
In the shopbot software, you can press the yellow button to the rigth in the window. This will allow you to control the machine manualy, using the arrow keys on the keyboard.
Up and down movement is controlled by page up and page down. You can also acsess manual kontroll by pressing K on the keyboard.
using calipers, measure the thicknes of the material you are to cut accuratly. Depending on the material, you have several options to secure it:
the simplest method of attaching material to the shopbot, is standard wooden screws. Screw the material down onto the sacrificial layer. make sure that you will not run into the screws with your cutting bit.
For securing materials the with and length of the shopbot, clamps can be used, altough not optimal. make sure that the clamps will not be hit by neither the ganty or cutting tool.
for thin pieces of metal, wood or plastic, double sided tape is a great option. Doble sided tape can also be used in combination with other methods, to help dampening vibrations. In combination with a waterbed, double sided tape can be used for cutting composites aswell.
Attaching material
using calipers, measure the thicknes of the material you are to cut accuratly. Depending on the material, you have several options to secure it:
Screws
the simplest method of attaching material to the shopbot, is standard wooden screws. Screw the material down onto the sacrificial layer. make sure that you will not run into the screws with your cutting bit.
clamps
For securing materials the with and length of the shopbot, clamps can be used, altough not optimal. make sure that the clamps will not be hit by neither the ganty or cutting tool.
Double sided tape
for thin pieces of metal, wood or plastic, double sided tape is a great option. Doble sided tape can also be used in combination with other methods, to help dampening vibrations. In combination with a waterbed, double sided tape can be used for cutting composites aswell.
Changing the tool
!Warning!
You MUST set the zero heigth for the Z axis after changing the tool!
With the material secured on the shopbot, move the machine to a area where you can comfortably access the spindle. Lower the dust skirt by unscrewing the knob marked by the red circle:
With the dust skirt down, it is easy to acsess the spindle, where you mount the tool
The tools are held by collets, inserted into a collet nut. It is important that all clamping surfaces is free from dirt and nicks. Inserting a collet in bad condition in the machine, will damage the spindle.
First insert the collet in the nut. The collet should easly snap into the nut.

Then the tool into the collet.

The tool shall only be clamped on the smooth shaft, not on the cutting edges. This would damage both the collet and tool.
screw the assembly onto the spindle by hand,

Then tigthen The assembly using the wrenches.
Protip: lefty loosy, rigthy tigty. Do not overtigthen!

Once the tool is securely mounted, you can raise the dust skirt.
!Warning!
You MUST set the zero heigth for the Z axis after changing the tool!
setting z zero
1 Using manual control, position the tool over the material that are to be cut.

2 Press the Z zero button.
3 remove the zeroing plate form the gantry.
4 Touch the Tool with the platete to ensure that the green signal is showing in the shopot software.

5 place the plate directly underneath the cutting tool.

6 At this stage, pressing enter, or OK in the dialog box, will cause the zeroing procedure to start.
The heigth of the new tool is now registred, and the machine is ready to use!
Dust collection system
To activate the dust collection system, lift the cover, depress the gren button, then slowly let the hatch down.
Warning!
This door needs to open for the system to work!

Kommentarer
Legg inn en kommentar